Input Data on the Software

Theory

As with all the features on Hexfit, our goal is to adapt to your reality and needs. This is why the data section on Hexfit is a very flexible tool which allows you to analyze an infinite amount of information, to ensure all the data you need to track with your clients is readily available. This tool can be found under the “Information” section of your client’s file by selecting the “Data” tab. By default, Hexfit has over 80 different data categories available for you to track. However, this does not mean you are limited to analyse only this data.

There are three ways to add data onto the software

 
Manual Entry

The most widely used method to enter data on Hexfit is through manual entry. This can be done by clicking on the “Add a new value” button in the “Data” section of your client’s file. You then have the flexibility to select the data you would like to add and enter the appropriate values. Once this data has been saved, it can be found in the “Data” section under the drop down menus of their respective categories.


Document Entry

By completing the course Hexpert of Administration, you will learn how to create custom electronic documents on Hexfit. Once created, you will be able to complete these documents under the “Overview” of your client’s file as a “Document Intervention.”

Since everything across Hexfit is linked together, as you and your clients complete these documents, all the quantitative data entered will be saved and centralized in the “Data” section of the client’s file. This method gives you a more structured and efficient way of inputting your client’s information. The saved data will be found in the “Data” sections under the drop down menus of their respective categories.

CSV File Import

Uploading data through a CSV file is designed for bulk data entry. This allows you to import data which has already been entered on a CSV file into multiple clients’ accounts at the same time. This is a great way to import your client’s data history.

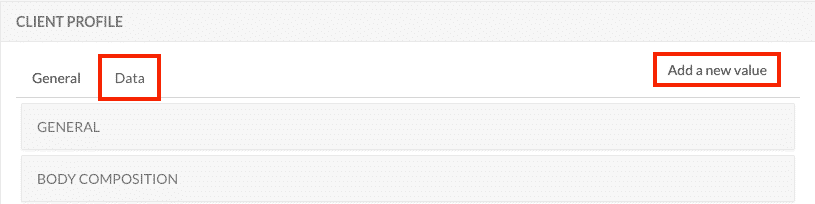
This tool can be used by administrators through the “Clients” tab by clicking on the “Actions” button and selecting “Import data.” Once the import had been made the information can be found in the “Data” section of each respective client’s file under the drop down menus of the respective data categories.

With the idea of allowing you to work with your clients in the methods of your choice, you can also easily enter data for multiple clients at the same time on the software. Hexfit has a tool specific for this need in the “Groups” tab. By completing the course Hexpert of Groups, you will learn more about how to use this tool.

Due to the value Hexfit places on flexibility, you can create new data categories with any calculations you need. Continue onto the next lesson for more information on this feature.

Because Hexfit is an intelligent system, you can always see the history and evolution of your client’s data by clicking on the drop down menu of the data categories. In the following section, Data Analysis, you will learn about how to do a more advanced analysis of your client’s data to visualize their evolution and progress.

Practice

We would like to invite you to take the time to walk through all the different methods of imputing data and the default categories available for you to track. Don’t forget that you can always create your own custom data if needed! Follow the these step to input your first manual data:

  1. Go to the “Information” section of your client’s file
  2. Click on the “Data” tab at the top of the page
  3. Click on the “Add a new value” button in the top right corner
  4. Choose the data you would like to enter with the appropriate unit
    1. Weight- kg
    2. Height- m
  5. Click on save
  6. The height and weight entered will appear under the “General” category
Étienne Dubois

Articles relatifs

Share This